Google (google.com) |
|
| Protocol | OAuth 2 |
| Returned Data | userId, name, email, photo |
| Requires SSL? | No |
How to Set Up Google Login API for Magento
In this article, you will learn how to find your Google Login API and integrate Google Login into Magento Social Login Pro plugin. Please follow the step-by-step instructions below.
Step 1. Create New Project
Step-by-step guide:
- Login to console.cloud.google.com and go to APIs & Services -> Dashboard in th left sidebar menu.
- Click Create Project.
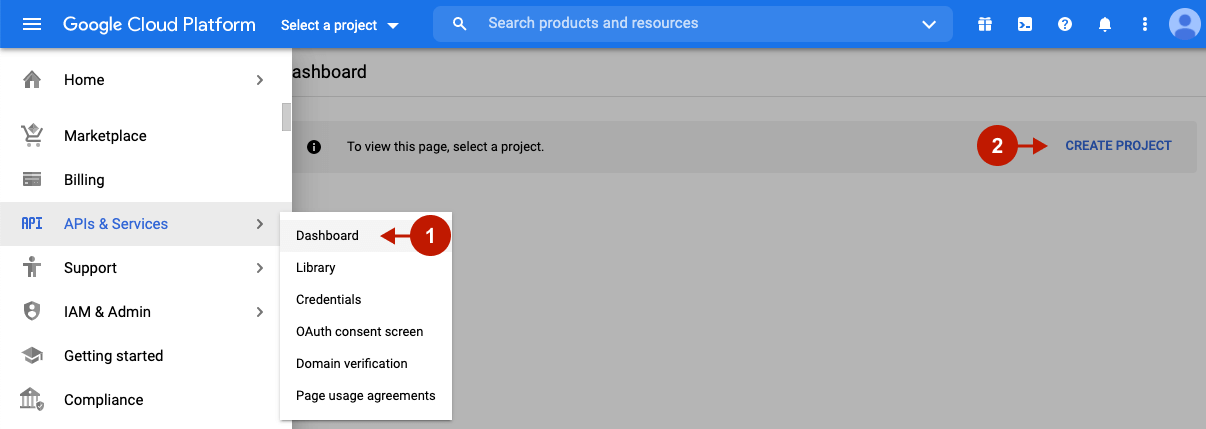
Step-by-step guide:
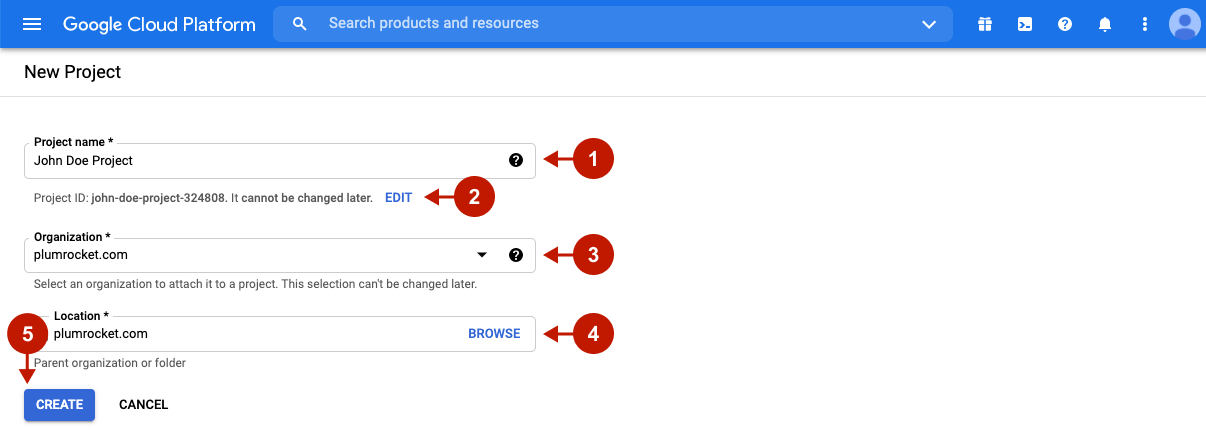
- Enter a descriptive name for your project in the Project Name field.
- Optionally, you can change the Project ID by clicking Edit. You cannot change it after the project is created.
- Click Organization and select your organization.
- In the Location field, click Browse to display locations for your project, click a location and then click Select.
- After all fields are completed, click Create. The console navigates you to the Dashboard page, and your project is created within a few minutes.
Step 2. Enable API
Step-by-step guide:
- Click Enable APIs and Services to go to the API Library and create APIs for your project.
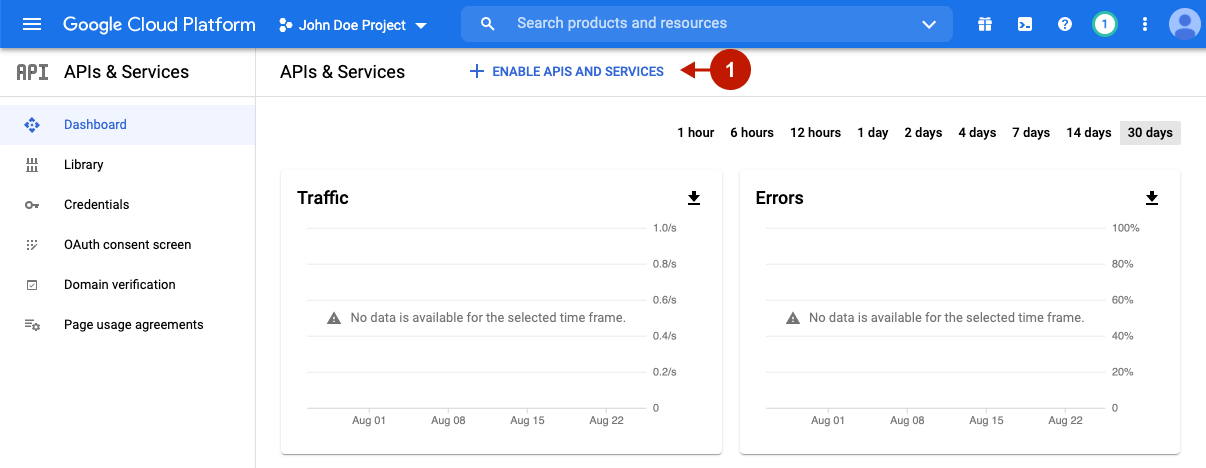
Step-by-step guide:
- Search for “IAM“.
- Click the IAM Service Account Credentials API to enable it for your account.
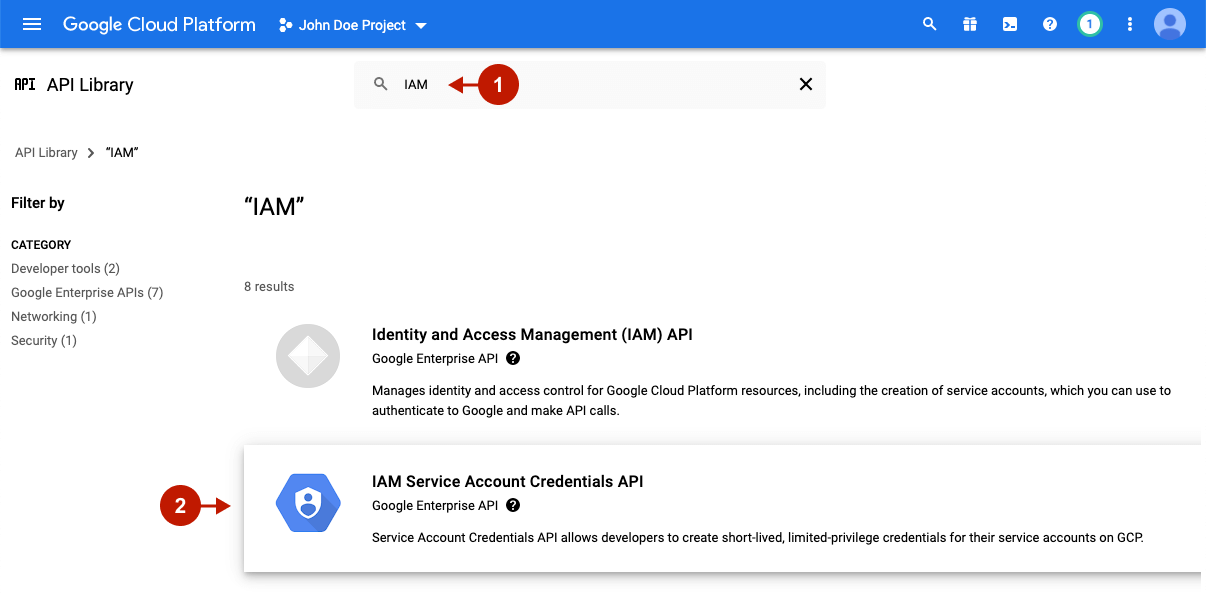
Step-by-step guide:
- Click Enable, and the Overview page will appear.

Step 3. Create API Credentials
Step-by-step guide:
- You need credentials to use the enabled API. Click Create Credentials to get started.

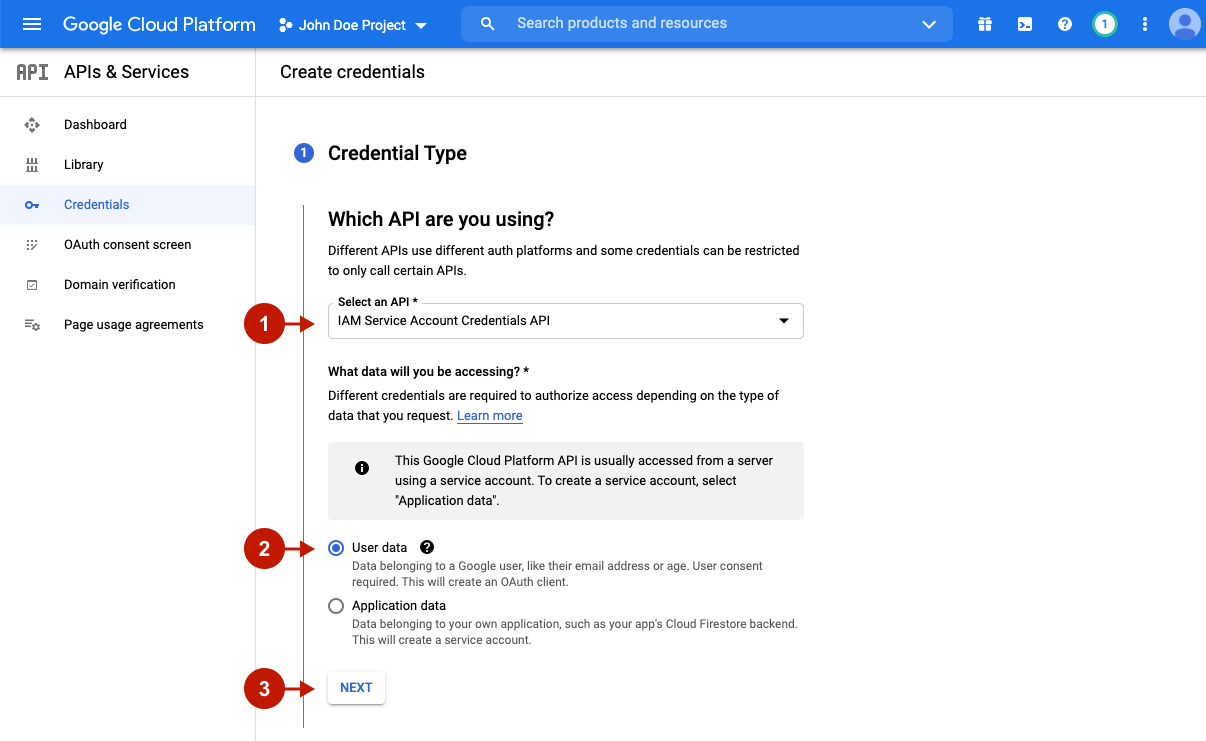
Configuring Credential Type
Step-by-step guide:
- In the Select an API field, choose IAM Service Account Credentials API.
- Choose User Data in order to create an OAuth client.
- Click Next.
Configuring OAuth Consent Screen
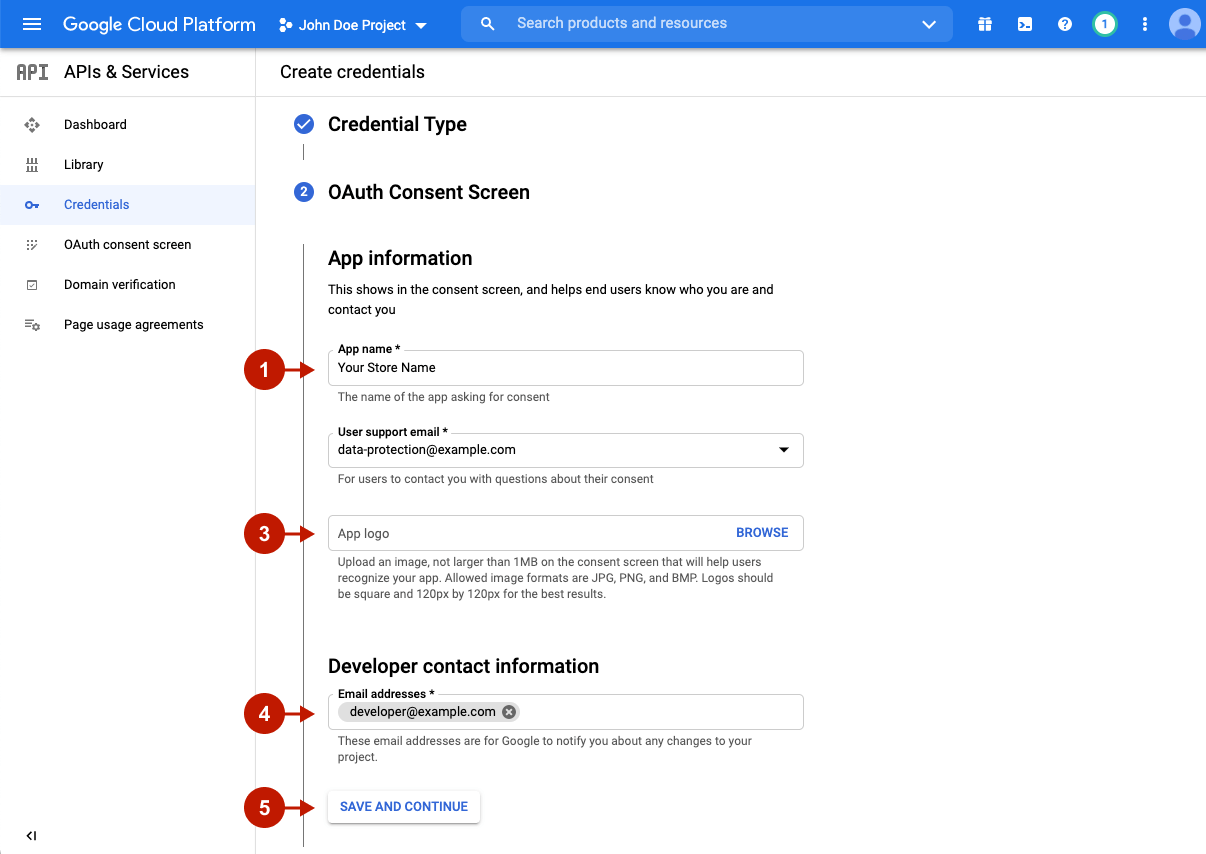
Configure the Consent Screen in order to indicate your Magento social share extension application data.
Step-by-step guide:
- App Name: enter the name of your Magento store that asks customers for consent to use their Google account data for authentification.
- User support email: provide an email for users to contact if they have questions about their consent.
- Upload your Magento store logo to be displayed on the consent screen.
- Under the Developer contact information, provide Email addresses for Google to notify you about any changes to your project.
- Click Save and continue.
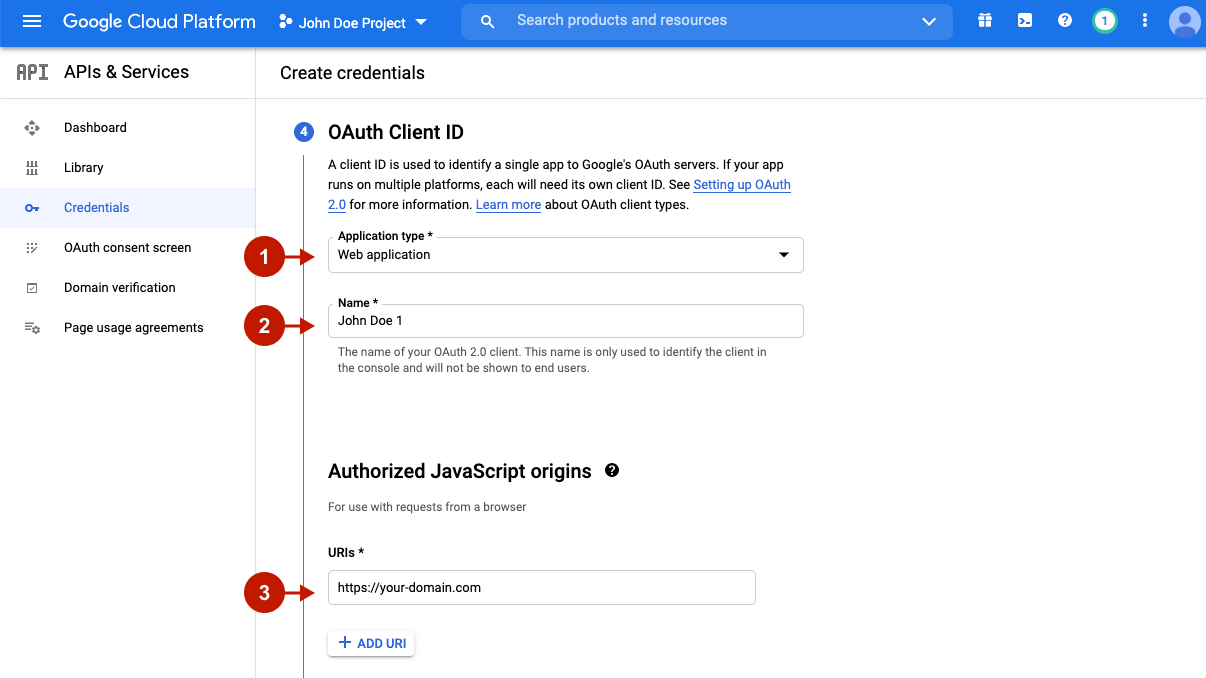
Configuring OAuth Client ID
Step-by-step guide:
- Set the Application Type to Web application.
- Specify the Name for your OAuth 2.0 client.
- Under Authorized JavaScript origins, enter the URL of your live domain by clicking ADD URL.
Step-by-step guide:
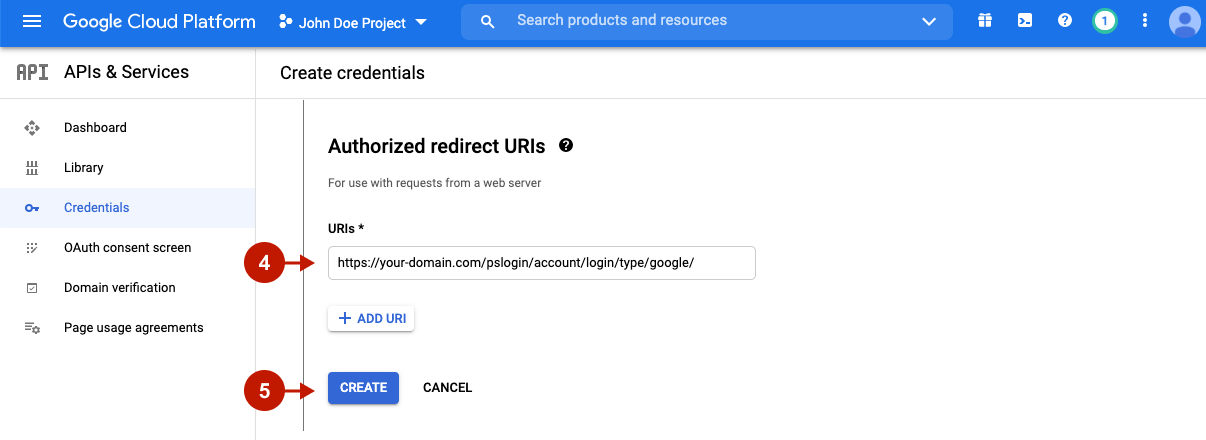
- Under Authorized redirect URLs, past your Magento 2 redirect URL. To find it, go to your Magento admin panel -> Plumrocket -> Social Login Pro -> Configurations -> Google -> Redirect URLs.
- Click Create to finish creating credentials for your application.
Downloading Credentials
Step-by-step guide:
- Once the credentials are created, click Download to get your Client ID and Client Secret necessary to integrate Google Login to your Magento 2 store.
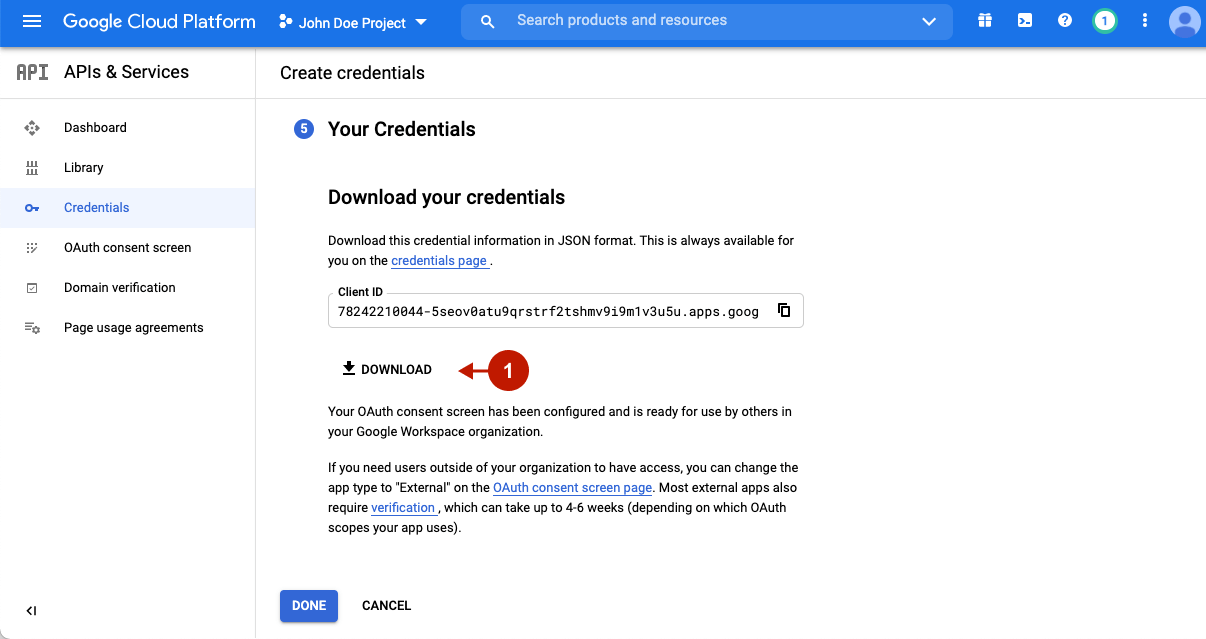
Step-by-step guide:
- Once you open the file, you can find your Client ID and Client Secret.

Step 4. Create an API Key
Now you need to create an API key for your project.
Step-by-step guide:
- Navigate to the APIs & Services -> Credentials panel in Cloud Console.
- Click Create credentials, then select API key from the dropdown menu.
- Copy your newly created API key is displayed in the API key created dialog. Copy this key to paste later in your Magento admin panel.
- Click Restrict key to secure your API key and avoid using it by anyone from anywhere.
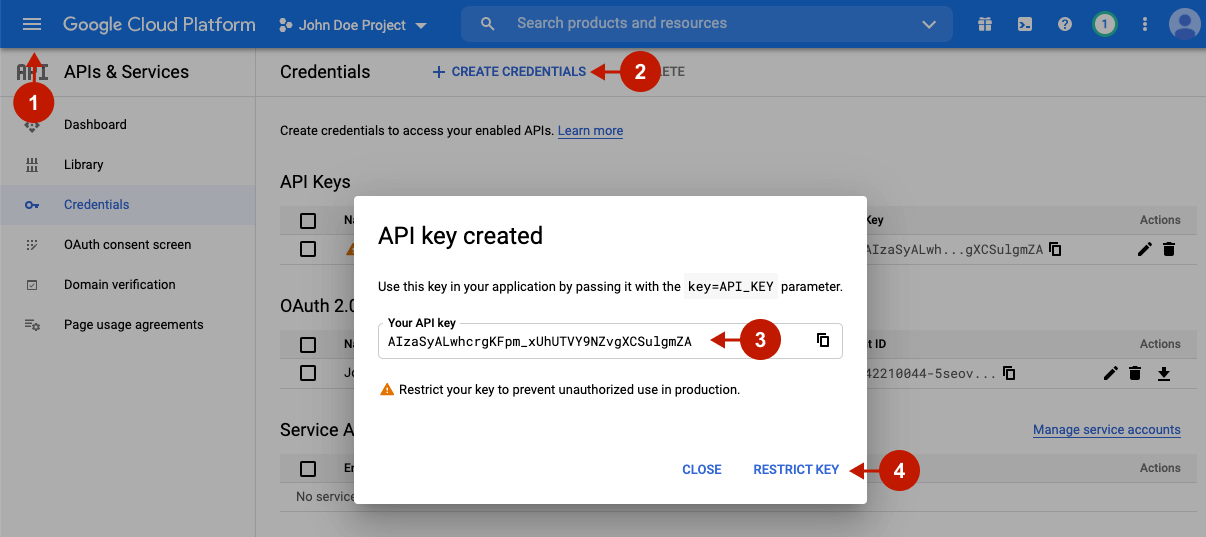
Step-by-step guide:
- Name: you can edit your API Key name in this field.
- Under the Application restrictions, select HTTP referrers (web sites).
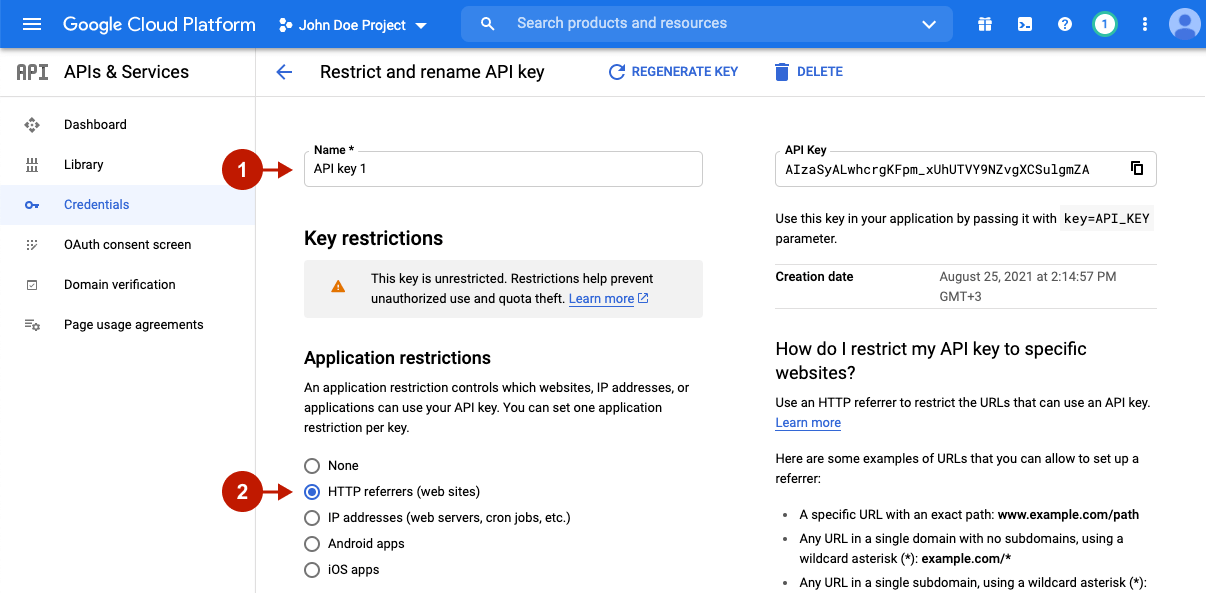
Step-by-step guide:
- Click Add an item and provide at least one restriction in the Website restrictions section. This way, you specify which websites can use your API key. Optionally, you can use wildcard characters (
*) for the subdomain and/or path. Make sure to provide both HTTP and HTTPS paths if your domain supports both. - Click Save.
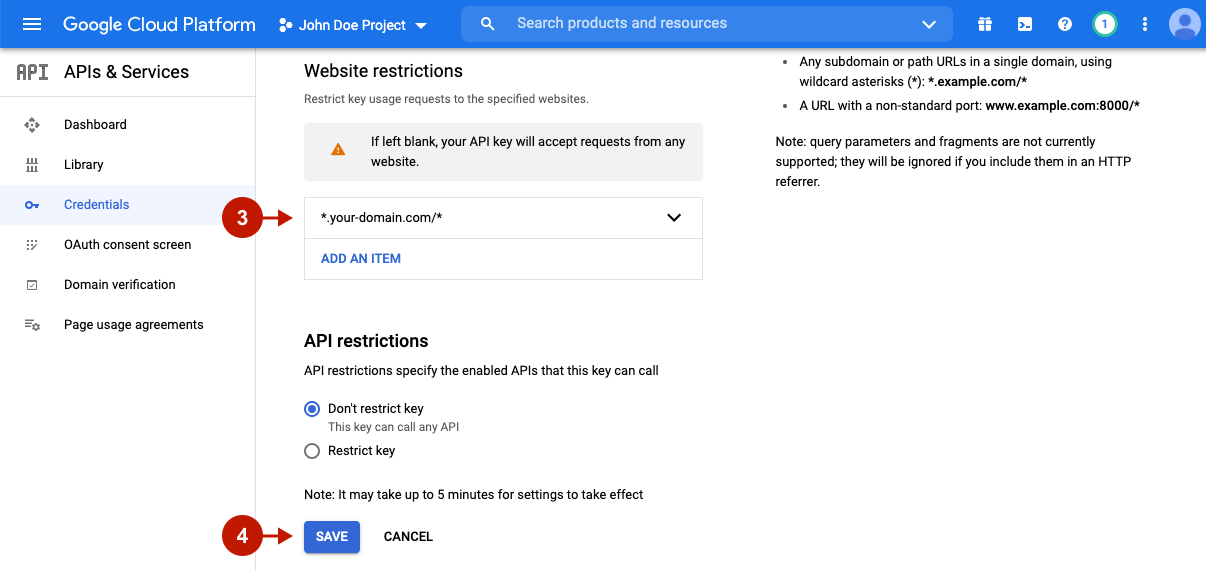
At this point, you have completed the creation of API for your Magento store. Proceed to the next section in order to configure the Google Login in the Magento admin panel.
Configuring Google Integration in Magento Social Login Pro Extension
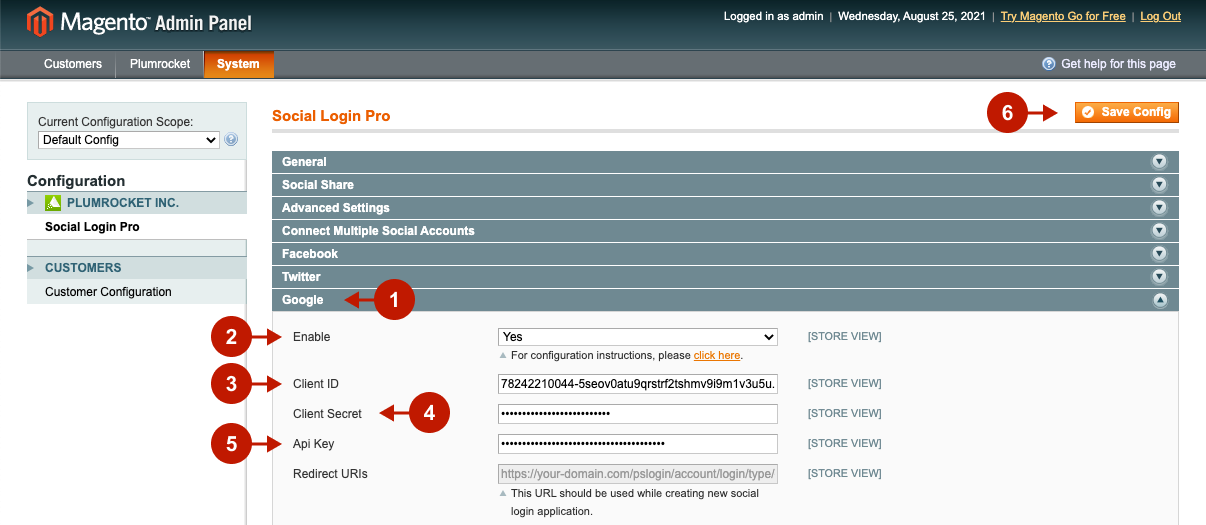
In order to integrate Google Login into your Magento store, go to System -> Configuration -> Plumrocket Inc -> Social Login Pro in the Magento admin panel.
Step-by-step guide:
- Go to the Google tab.
- Set the Enable option to Yes to enable the Google integration.
- Paste Client ID into this field.
- Paste the Client Secret key into this field.
- Enter your Google API Key, which can be found at your Google Developer’s account.
- Click Save Config to save your settings.
Configuring Google Integration in Magento 2 Social Login Pro Extension
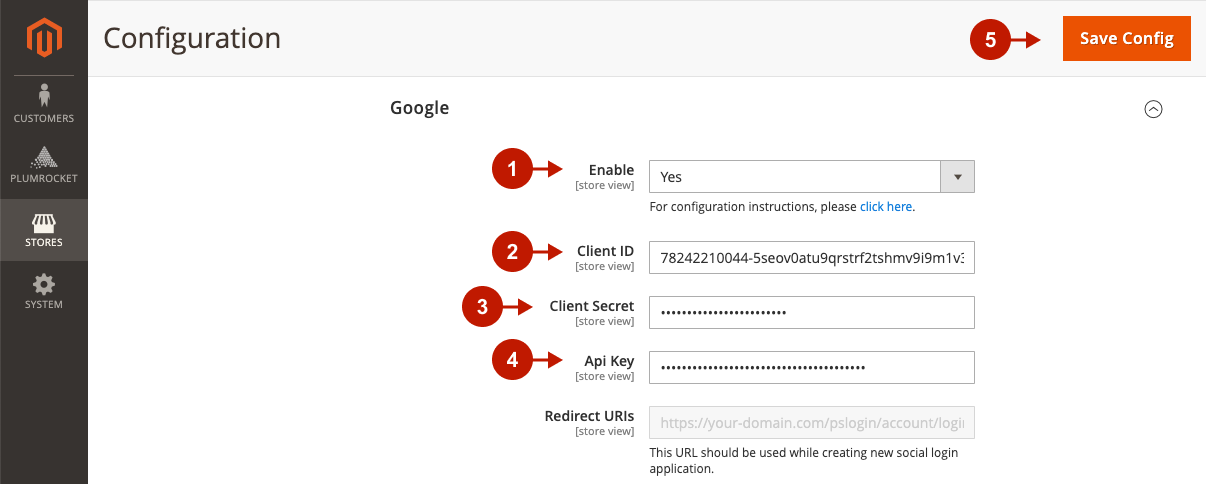
In this step, you must update your Magento 2 Social Login Pro Extension configuration. In your Magento admin panel, go to Plumrocket -> Social Login Pro -> Configuration -> Google.
Step-by-step guide:
- Set the Enable option to Yes to enable Google Login on your Magento 2 website.
- Paste the Client ID into this field.
- Paste the Client Secret key into this field.
- Enter your Google API Key in this field.
- Click Save Config.
Enabling Magento Google One-Tap Sign Up and Sign In
Please follow the How to Add Magento Google One-Tap Sign In article if you want to enable it on your website.
At this point, setting up Google Magento Social Login and Magento 2 Social Login application is complete.
Next Step > Return to Social Login Pro API Reference
